العربية




Quick Answer
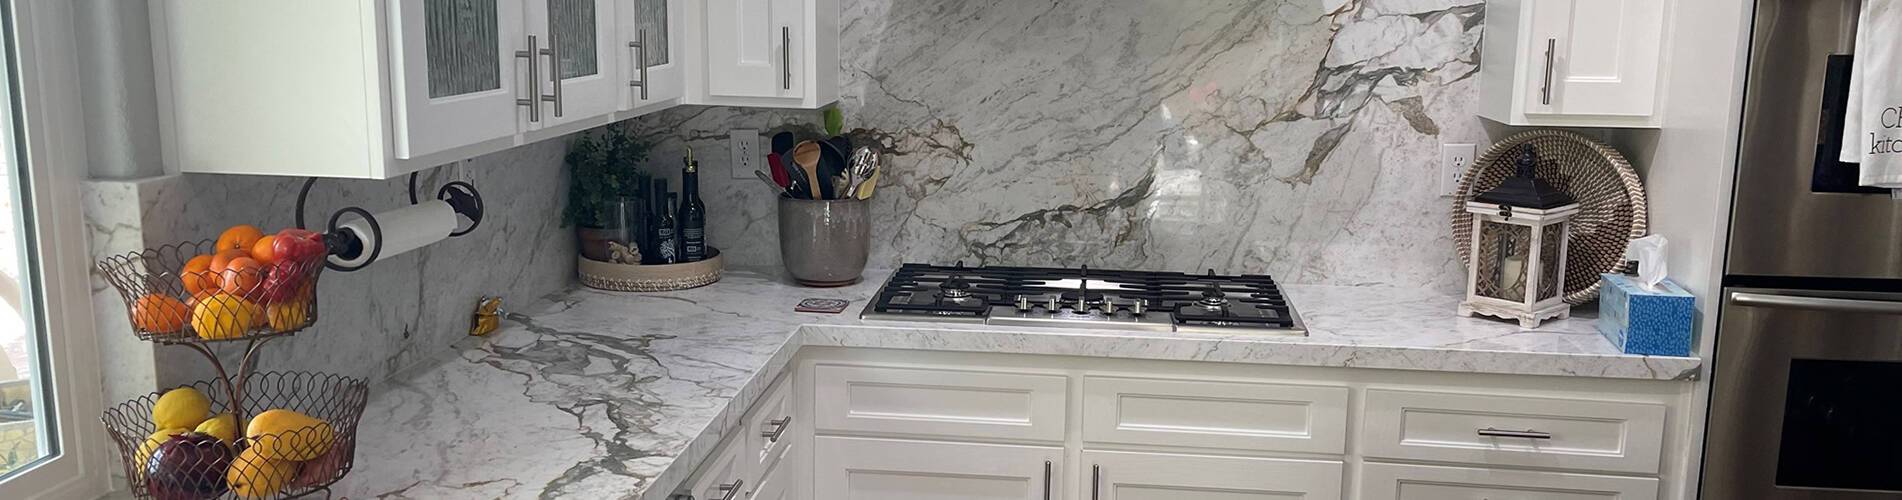
Sintered stone fabrication is the work done after a slab is manufactured: cutting, drilling, edge finishing and joining it into countertops, sink surrounds, waterfall panels, wall panels and furniture tops. The material is hard but can chip at cut edges and crack from sharp internal corners, so clean results depend on tooling made for the material, continuous water cooling, support on both sides of each cut and rounded cutout corners. Sink models, seams, pattern direction and exposed edges should be settled before the first cut.
A hard finished surface can still chip at a cut edge or crack from a sharp internal corner. Large, thin pieces also need careful support during machining and handling, especially after openings have been cut. Successful fabrication addresses these vulnerable areas while producing the dimensions, edges and pattern layout the project requires.
We supply full slabs to local fabricators and fabricate finished components to drawings in our own factory.
Contents
Fabrication begins with inspecting the slab and planning the component layout. The fabricator checks the face, edges and condition of the material before cutting, then positions the pieces around the required dimensions and pattern direction.
Different operations perform different jobs:
| Fabrication task | Typical method | Finished result |
|---|---|---|
| Straight sizing | Bridge saw | Components cut to the required outline |
| Curves and internal openings | Waterjet or machining tools matched to the shape | Shaped pieces and cutouts |
| Holes and detailed machining | Core drilling and CNC machining | Fixture holes, contours and specified details |
| Exposed-edge finishing | Edge-processing and polishing tools | Finished profiles and smooth cut edges |
| Mitered construction | Angled cutting, finishing and joining | Deeper edge faces and joined corners |
One component may need several operations. A countertop with an undermount sink and a mitered front requires straight cutting, opening preparation, finishing around the visible sink edge, and preparation of the joining faces.
A clean cut depends on four things: tooling matched to the material, support on both sides of the cut, consistent water cooling and a trial cut on an offcut.
Tooling should be intended for sintered stone or the relevant porcelain-type material and matched to the machine. A blade that performs well on another stone does not automatically produce the same result on the selected slab.
Support matters on both sides of the cut. The main component needs a stable working surface, while the offcut needs support so it cannot break away and damage the edge as the cut finishes.
Water cooling must reach the cutting area consistently. Together with controlled feed and tooling matched to the material, it helps limit heat and cutting stress. Wet processing and the required dust controls belong in the working setup.
With a new slab or tooling combination, we first make a trial cut on an offcut and inspect the cut edge for chipping. For fabricators processing our slabs locally, we also provide tooling advice.
The machine performs the cut; support, tooling and finishing determine the condition of the resulting edge. A cutout can have the correct dimensions and still need further work on the edge that will remain exposed.
Several decisions shape the fabrication layout. Each is easiest to settle before the first cut:
| Decision | What it affects |
|---|---|
| Sink or cooktop model and mounting method | Opening shape, visible edge finish, surrounding material and support |
| Seam positions | Visible joints, support points and the size of pieces that can reach the site |
| Pattern direction | Where edge strips and waterfall panels are cut, and how much material the layout uses |
| Finished edge height | Front-face proportion and clearance for drawers, doors and appliances |
| Exposed edge treatment | Whether the slab body remains visible or a mitered detail carries the face pattern |
Provide the sink or cooktop model and mounting details before fabrication. Top-mounted, undermount and flush-mounted fittings require different opening and edge details.
An undermount sink leaves the cut edge visible. Its shape and finish therefore become part of the completed countertop. A flush-mounted fitting may require a machined recess as well as an opening.
Sharp internal corners can become starting points for cracks. Cutouts need rounded internal corners, and the center section needs support before the final cut is completed. Rounded corners reduce stress concentration; supporting the center prevents it from dropping and damaging the remaining piece.
The opening also needs enough surrounding material to suit the slab and layout, especially near the front edge or a seam.
These are reasons to settle the fitting and mounting method early. Changing the sink later can affect the opening, visible edge, surrounding material and support arrangement—not just the hole dimensions.
Seams divide a layout into pieces that can be fabricated, transported and installed. Their position also affects the finished appearance and where support is needed.
A one-piece section can reduce visible joints, but it must fit the available slab and reach its installation position. Doorways, stairs and lifts can limit the size of finished pieces that can enter the building.
For patterned designs, plan the countertop, edge strips and waterfall panels together. Pieces cut independently from convenient areas of the slab may have the correct dimensions but produce an interrupted pattern when assembled.
The layout should show where the seams fall and how adjoining pieces relate visually. Resolve this before cutting, while the position of the components can still be changed.
Most projects can start by comparing a simple squared appearance, a softened edge and a mitered edge.
| Edge choice | Finished effect | Main consideration |
|---|---|---|
| Straight edge with a small chamfer | A crisp outline with the sharp corner removed | Chamfer size and exposed slab-body appearance |
| Small-radius or rounded edge | A softer outline and feel | Profile shape, available thickness and side appearance |
| Mitered edge | A deeper visible edge face | Finished edge height, pattern alignment and joint appearance |
Removing a sharp exposed corner helps reduce its vulnerability to knocks. The amount of rounding or chamfering also changes the appearance. A profile name describes the general shape; a finished edge sample shows the actual outline and surface finish.
On surface-printed slabs, the cut edge can differ from the decorated face in color and pattern. This is particularly noticeable on exposed countertop ends, furniture tops and undermount sink openings.
Polishing can produce a smooth cut edge, but it does not reproduce the printed face pattern on the slab body.
We provide cut and finished edge samples so the exposed slab body and edge finish can be seen together. A face sample shows the surface design; a processed edge sample shows what remains visible after fabrication.
That comparison helps establish whether a simple exposed edge gives the intended appearance or whether a joined detail would better suit the design.
A mitered edge joins two pieces cut at matching 45-degree angles. The edge strip creates a deeper front face while the main countertop retains its original slab thickness.
Specify the actual slab thickness and the finished edge height separately. A deeper edge strip extends farther down in front of the cabinetry and may affect clearance for drawers, doors or appliances.
For patterned slabs, plan where the edge strip will be cut. Taking it from beside the intended joining edge can help carry the design around the corner. That strip requires space in the slab layout, which can affect material use.
The completed miter has three separate visual results:
A mitered construction creates the thicker appearance, but careful layout and joining determine the other two results. A miter sample shows the joined corner and its finish, details that a flat surface sample cannot show.
A waterfall panel extends the surface down the side of an island or cabinet. Plan its pattern, dimensions and joint with the top as one assembly.
Before packing, components should be checked against the approved dimensions, openings and layout. Exposed edges are reviewed for chips or unfinished areas, and mitered joints and adjoining patterns are checked for appearance. We take close-up inspection photographs of exposed edges, mitered joints and cutout edges. A wide view records the overall layout and pattern; close views show the cut-edge finish, corner treatment and joint line.
Handling requires particular care after cutouts are made. A sink opening leaves narrower sections of material around it, and a large panel can be damaged if it bends or twists during lifting.
Use handling equipment that supports the component without allowing it to flex, protect edges and corners, and plan how the piece will be lifted from its packing. Finished pieces should be carried with the orientation and support specified for the component.
On arrival, inspect packaging and components, record visible damage promptly, and resolve concerns before installation proceeds.
For countertops, the cabinetry and supporting structure should be ready before final site measurements are taken. Seams, appliance openings and overhangs need a planned support arrangement.
An undermount sink requires its own support for the sink and its working load. The countertop and adhesive alone should not be expected to carry a filled sink.
Fabricated pieces should arrive with component identification numbers and a layout drawing, allowing the installation team to match each piece to its position.
Dry-fitting checks how the fabricated components meet the actual site before they are fixed:
If a piece does not fit, identify whether the cause is an obstruction, the supporting surface or the fabricated dimensions. Resolve it before bonding; forcing a slab into position can introduce stress.
The fixing method should match the application.
For countertops, complete the specified bonding, joining and sealing after fit and support have been checked. Keep construction loads off the surface while the fixing materials cure.
For bonded wall and floor panels, the substrate must provide an even base. Local high spots or depressions can prevent a large panel from bedding properly.
Adhesive application should produce the required contact beneath the panel, including its edges and corners. A check during placement can reveal uncollapsed adhesive ridges or unsupported areas while the installer can still correct them. Leveling clips help align adjacent edges; they cannot correct high spots or fill depressions in the base.
Preserve the planned joints and complete the specified joint treatment. Before use, inspect the exposed edges, seams, fittings and supports, and follow the installer’s release schedule.
Yes, for certain cuts, holes and finishing tasks. Holes are made by core drilling, and detailed machining with CNC equipment. Handheld work still needs tooling intended for the material, stable support, cooling and dust controls.
Identify any machining expected on site before the components are produced. Large openings, long exposed edges and mitered details need working conditions that allow the required accuracy and finish.
The waiting period depends on the adhesive, sealant or fixing system and the installation conditions. Grouting, light use, water exposure and full loading may have different release times.
Obtain the schedule from the installer so other trades and end users know when the surface is ready.
Excellent offers both supply formats. The right one depends on where the fabrication work will take place.
| Full slabs | Cut-to-size components | |
|---|---|---|
| Suits | Fabricators processing the material locally | Project orders with defined dimensions and processing requirements |
| What we provide | Tooling advice and small samples of slabs in different colors and surface finishes | Cutting, drilling and cutouts, edge finishing, 45-degree miters and waterfall panels |
For cut-to-size orders, drawings should establish the openings, exposed edges, joined parts and pattern arrangement, with site measurements and installation conditions coordinated before production. On-site installation is handled by the local installation team.
Several fabrication details show more in a finished result than in a description:
| Detail | A description gives | The finished result shows |
|---|---|---|
| Cutting method | A list of machines | How each opening and exposed edge is made |
| Edge profile | A profile name | The actual outline and finish on an edge sample |
| Slab body | A face sample | The exposed body on a processed edge sample |
| Mitered corner | A flat surface sample | The joint line and corner finish on a miter sample |
| Inspection | A wide photograph | Edge finish, corner treatment and joint lines in close-up photographs |
Our quotations specify how each hole, finished edge and miter is to be made. When comparing quotations, check that they cover the same work. Differences can include:
These details explain why two quotations for the same countertop area can cover different amounts of fabrication.
For a project quotation, send your drawings or dimensions, quantities, selected slab, sink and cooktop details, edge requirements, pattern preferences and delivery destination.
Send drawings for a fabrication quotation
Processing the slabs locally? Tell us the colors and finishes you are considering. Request slab samples or tooling advice
فئات
بلوق جديد
 ROOM 205,NO.45, MIDDLE HAIJING ROAD,XIAMEN,AREA OF PILOT FREE TRADE ZONE(FUJIAN)OF CHINA
for استفسارات حول منتجاتنا أو الأسعار بينها، يرجى ترك لنا وسنكون على اتصال في غضون 24 ساعات.



© حقوق النشر: 2026 XIAMEN EXCELLENT STONE CO.,LTD. كل الحقوق محفوظة.

دعم شبكة IPv6